A modest clothing rack made of wood is such a worthy addition to the boudoir or entryway. Now, I am glad to share you how to do a lovely clothing rack on your own so that you can easily display your favorite pieces or overflow for each season. If you do not need it anymore, you can also take it apart and store it in the corner of your room easily.
I purchased the wood just a few days ago, and it took me a certain time to complete my clothing rack. It was such an easy task with my dad’s help. He was very eager to do the screwing, drilling, cutting and measuring and we got the DIY wooden clothes rack done greatly.
Here is the way I made my own rack, and you can refer to make yours.
Supplies
- Wood glue (optional)
- 2 Leather cording: 50 inches x 0.125 inches
- 2 Leather cording: 23 inches x 0.125 inches
- Drill bit sets, which have 5/32” drill bit and 7/8” drill bit
- Pencil
- Measuring tape
- One poplar dowel: 7/8 inches x 48 inches
- 4 poplar dowels: 1 3/8 inches x 72 inches
Step 1:
Firstly, from the top of each four poplar dowels (1 3/8 inches x 72 inches), measure down and use the pencil to mark down 15 ½ inches. The mark you have just done will be the hole’s center.
Use a 7/8” drill bit to drill a hole on every mark, through the poplar dowel. Ensure to keep the hole straight when you drill through. Your clothing rack will not be level in case you drill those holes at other angles. Remove roughness by sanding the hole opening.
Step 2:
From the bottom of 4 poplar dowels, measure up and mark 8” up. Besides, you had better make sure that all of the marks are 90º from the top hole.
Use a 5/32” drill bit to drill a hole on every mark, through the poplar dowel. Ensure to keep the hole as straight as possible when drilling through. Again, remove all the roughness by sanding the hole opening.
Next, gather 2 dowels together so that you can form an end of your rack. Then, insert a 23” leather cording through those 5/32” holes and knot the ends. By knotting, you can prevent dowel legs from falling flat and sliding open on the floor.
Repeat for other remaining 2 dowels and 23” leather cording.
Step 3:
Insert the 7/8 inches x 48 inches dowel through one side of the rack’s top holes and allow 1 ½ inches to protrude from the end.
Then, through the remaining 2 dowels, insert the other end, in the same way.
Open your clothing rack to the point, in which the 23-inch-leather cording on two sides is extended fully.
Step 4:
In which the 3 poplar dowels meet, center the 50-inch-leather cording around and wrap around two times in a diagonal direction, then, continue to wrap around another two times in the opposite diagonal direction so as to create an “X” form.
Next, double knot the ends together and then bury the tails in the leather cording. After that, repeat the same for the other opposite side.
Without the leather cording, you can also do this. You can resort to the wood glue to secure the poplar dowels together so as not to let the horizontal dowel slip out.
In case you make your own clothing rack without the help of wood glue, it will be much easier for you to take your rack apart and store it whenever you need. You may not want to overload your clothing rack. However, I think that if you want more space and need to display your favorite pieces, then, this will be an ideal option.
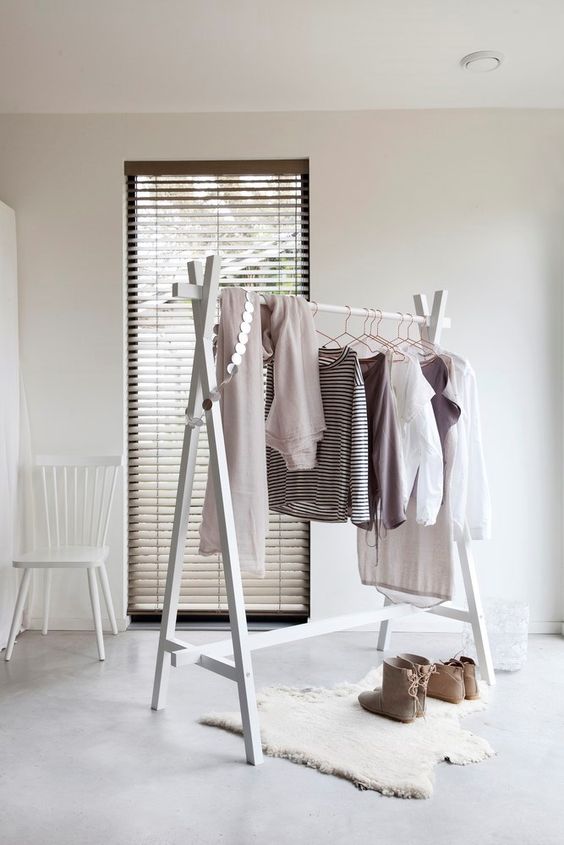
For designing, I just put 8 hangers with the clothes on my DIY rack. However, it can accommodate double or triple of that amount, relying on the weight of what you need to hang. I even try pull-ups on the rack to check its strength, and in fact, it does well. (Anyway, I do not recommend using your clothing rack as an additional exercising device!)
On the other hand, you can also hang your hats and purses. Besides, if you own little ones just like me, you can drape the fabric on it so that it can become the theater curtains and set the stage area for your little performances. With this lovely and simple wooden clothing rack, your life is much easier and simpler thanks to its multifunctional usages.
Author Bio:
My name’s Danny L. Montgomery. I’m the founder and owner of the blog zukzik.com. I love all things DIY & Home Decor. I hope I will be able to share my experiences with the interested readers