I finally did the one thing that made my parents most proud of me. I finally moved out! About a 20 year old apartment. New carpet. New paint. Bought some used furniture from Craigslist and LetGo ads. I had it all, until the eye opener. Not the bills..THE CLEANING!
Using a vacuum I had down (well, best I can). Windex on the windows and counters. A little Pledge on my wood furniture. Then my dilemma… THE BATHROOM! Toilet and floors weren’t hard to clean, but what is with this gunk in between the tiles of my shower? Some parts are white; others a brown mess. I tried my small plethora of cleaning products and a paper towel and nothing seemed to really work. So, I did the only thing a guy in my position could do. Called my Grandma!
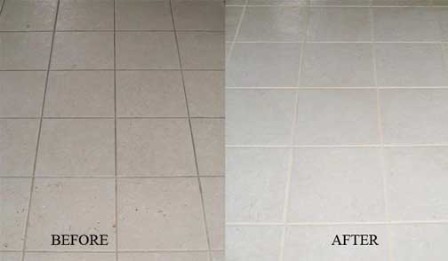
I figured she’s old. She’s had to have had this problem in the past 83 years. Her tiles in her shower do not look like this. So, I made the call and asked what this stuff is, and how do I get rid of it? It was like the first time I asked her “how to make spaghetti”. She was so excited to explain to me this gunk is mold and mildew caused by heat and steam over time, mixed with soap scum, and it is growing in the GROUT! The white spaces between the tiles (well they are suppose to be white). She explained how to fix this problem:
Turns out there is a natural way to fix this and most of the things I needed to do the job I already had in my house. She said you can use bleach, but it may just mask the problem. She suggested the following:
STEP #1
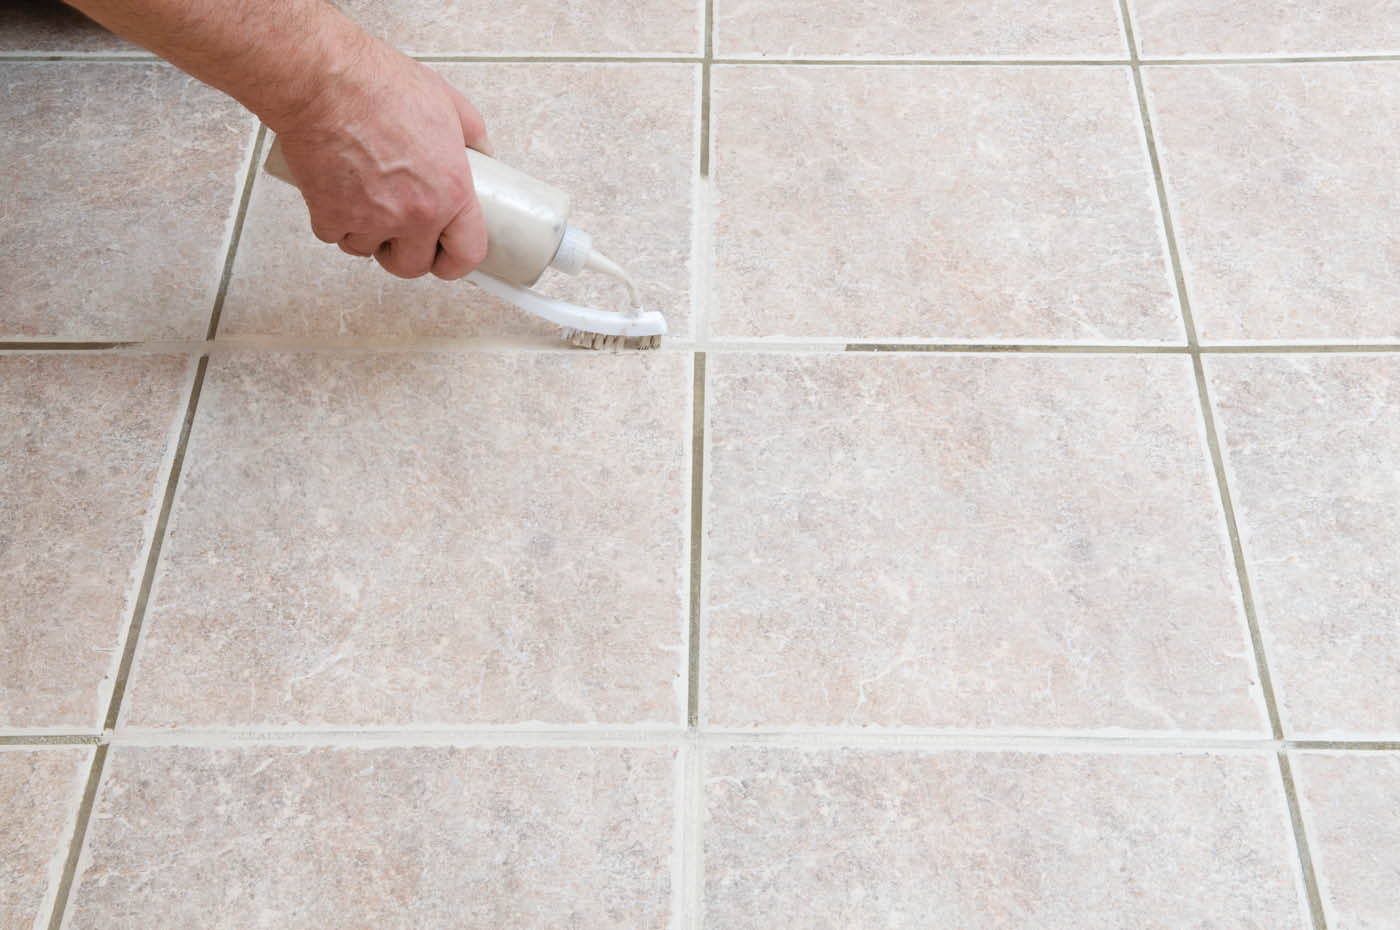
BAKING SODA. Already had a box of baking soda in the fridge. Put about ½ a cup in a bowl. Dampen a sponge with warm water and wipe down the areas need in the shower. Followed by:
STEP #2
DISTILLED WHITE VINEGAR and a SPRAY BOTTLE. These things I didn’t have, but a quick trip to Walmart, I now had both. I bought a 16oz. bottle of the vinegar, and a spray bottle from the cosmetics aisle. Fill the spray bottle halfway with the white vinegar and fill the other half with warm water. Spray the whole shower, paying extra attention to the affected areas. Let sit for 15 minutes and scrub it down with a damp sponge. Then:
STEP #3
SALT. Just regular good old salt. I have a container of iodized salt in my cabinet I use for my salt shaker. Using a damp sponge, sprinkle salt into the areas needed and scrub it in. I was already noticing a change at this point. I was told to let that sit over night and wipe it down the next day. Then:
STEP #4
LEMON JUICE. Another item I didn’t have, but it’s next to the lemons in the fruit aisle also at Walmart. Mix it with a little bit of that baking soda and scrub away. Rinse it off and finally use some:
STEP #5
HYDROGEN PEROXIDE. My bathroom cabinet had some peroxide in it. Damped the sponge with it. Scrub and let sit for an hour. The wipe it away with water.
After this you just turn your shower on its hottest temperature and close the door. Let it steam.
It worked well for me and I hope it works well for you. Thanks Grandma!
If you don’t have the time to follow these 5 simple steps, no problem! Just hire a trusted cleaning service like Think Maids to do the grout cleaning for you 🙂